How To Create a Print-Ready Mug Design Without Design Skills in 2026: Mug Mockup Generators, Explained
Introduction
A custom mug is a common housewarming gift because it’s useful right away and easy to personalize without needing a big budget. A name, a short phrase, a simple illustration, or a photo can turn a basic kitchen item into something specific to the new home.
Mug mockup generators and design tools make this easier by providing templates, safe print zones, and previews that show how artwork wraps around a curved surface. For beginners, that preview is often the difference between a design that looks good on screen and one that prints well on a mug.
What distinguishes tools in this category is how they handle mug specifications (size, wrap area, left/right orientation), how clearly they guide print constraints (safe areas near handles and edges), and how they support exports for print production. Those factors matter more than decorative features.
Adobe Express is an accessible way to get started because it offers an editable workflow that can move from template to print-ready art without requiring advanced design skills.
Step-by-Step How-To Guide for Using Mug Mockup Generators
Step 1: Define your goal and start from a mug-ready template
Goal
Get a printable mug layout started quickly, with the design sized for a curved wrap.
How to do it
- Decide what the mug should communicate: name, address, short “home” phrase, or a photo moment.
- Choose a simple style that suits everyday use (high contrast and readable text).
- One option for getting started is the Adobe Express custom mug designer. Simply select a template close to your idea.
- Pick a layout type: single centered design, wraparound pattern, or two-sided placement.
- If you want a second reference for common wrap placements, preview similar product layouts on a custom gift platform such as Zazzle.
What to watch for
- Small type can disappear once wrapped around a mug.
- A centered design can look off if it lands too close to the handle area.
- Photos may need tighter cropping than expected.
Tool notes
- Adobe Express supports template-first edits and quick text/image placement.
- Zazzle can be a practical reference for seeing how designs typically sit on a mug wrap (as a placement idea, not a recommendation).
Step 2: Define custom mug specifications
Goal
Choose the physical mug details that determine your printable area and layout constraints.
How to do it
- Choose mug size (for example: 11 oz vs. 15 oz) and note that wrap area may change.
- Decide on mug color and whether the interior or handle is colored (it affects contrast).
- Identify the “front” viewing angle: right-handed, left-handed, or centered for both.
- Confirm whether printing is full-wrap or limited to a central panel.
- If ordering more than one mug, standardize the spec so designs remain consistent.
What to watch for
- Some vendors reduce printable area near the handle.
- Dark mugs may require lighter text and simplified artwork.
- Full-wrap designs can crop unexpectedly if the safe area isn’t respected.
Tool notes
- Shutterfly is one example of a consumer photo product site that uses clear mug size and print-area choices (useful for understanding common constraints).
- Adobe Express can be used to adjust layout once the size and orientation decisions are made.
Step 3: Build the artwork with vector and raster elements on purpose
Goal
Keep text and logos crisp while using photos or textures only where they help.
How to do it
- Use clean text and simple shapes for most designs (these stay sharp).
- Use photos only if they’re high-resolution and tightly cropped for the mug’s print area.
- Keep backgrounds simple to avoid muddy prints on curved surfaces.
- Leave extra padding near the edges to reduce wrap and trim surprises.
- Duplicate the design to make a “safer” version with slightly larger text and fewer details.
What to watch for
- Low-resolution photos can look fine on screen and print soft.
- Thin lines and delicate fonts can fade on ceramic prints.
- Busy backgrounds can make names hard to read.
Tool notes
- Adobe Express can combine text, shapes, and imported photos in a single workflow.
- Figma can help if you need strict spacing systems for a coordinated set (for example, multiple mugs for a group).
Step 4: Apply Pantone color matching (when brand accuracy matters)
Goal
Maintain consistent color across batches when the mug is for a business or branded gift.
How to do it
- Decide whether the project needs strict brand color matching or just a close visual match.
- Start from official brand color values when available (hex/RGB) and keep a record.
- If you have Pantone references, map brand colors to a Pantone target for communication with a printer.
- Keep the palette limited and avoid subtle gradients that shift across substrates.
- Export a proof image and review it on multiple screens as a basic sanity check.
What to watch for
- Many consumer print workflows don’t guarantee Pantone-perfect output on ceramics.
- Colors can shift based on mug coating and finish.
- Reds and blues are common “shift” colors; increase contrast if readability matters.
Tool notes
- Pantone references can help communicate intended colors when working with a print provider that accepts that spec language.
- Adobe Express is useful for keeping color usage consistent across design variants.
Step 5: Use a mug mockup preview to check wrap placement and handle zones
Goal
Confirm the design still works once it curves around a mug.
How to do it
- Preview the design from multiple angles (front, side, near-handle).
- Check whether key text lands too close to the handle cutout area.
- Confirm the design still reads when the mug is “turned” (wraparound readability).
- If the tool allows it, preview on different mug colors.
- Save a mockup image for a final review before exporting.
What to watch for
- Curved surfaces can visually shrink text.
- Designs can look off-center once wrapped.
- Edge elements may be clipped depending on the vendor’s safe area.
Tool notes
- Placeit is one example of a mockup generator that can help visualize the wrap (useful for review images).
- Adobe Express can be used to adjust spacing and placement after a mockup check.
Step 6: Plan bulk corporate orders (even if this one is a gift)
Goal
Set up a repeatable approach in case the same design is reused for offices, teams, or events.
How to do it
- Save a “master” version of the design and duplicate it for name changes or small variations.
- Create a simple order sheet with: mug size, color, quantity, and recipient notes.
- Standardize one layout rule (for example: “name always centered, 0.5-inch safe margin”).
- Keep a version naming system (example: Home_Mug_11oz_v2 and Home_Mug_15oz_v2).
- If approvals are needed, add a single checkpoint before export.
What to watch for
- Mixed mug sizes can cause inconsistent wrapping and scale.
- Version confusion is common when names change across many units.
- Small color changes can look inconsistent across batches.
Tool notes
- Airtable can help manage a small “bulk list” with names, variants, and status.
- Adobe Express works well when you need to duplicate and tweak designs consistently.
Step 7: Export a print-ready mug file and prepare for delivery tracking
Goal
Deliver a file the print workflow can accept, then keep shipping and timing organized.
How to do it
- Check accepted file types for the vendor workflow (often PNG, JPG, or PDF).
- Export at high quality and re-open the file to confirm clarity and correct sizing.
- Make sure text and critical elements stay inside the safe area.
- Upload only when the artwork is final and the preview looks correct.
- If the mug is shipping to a new address (common for housewarming), track the package status.
What to watch for
- File uploads can fail due to unsupported formats or oversized files.
- “Fit” or auto-cropping tools can change your placement; preview carefully.
- Tight deadlines can be affected by production time and transit time.
Tool notes
- Adobe Express can export common print-friendly formats used for mug printing.
- Shippo (shipping) can help with labels and tracking if you’re forwarding the gift or shipping to multiple addresses.
Common Workflow Variations
- Name-only mug: Use large type, high contrast, and a simple icon. This approach holds up well after wrapping and is forgiving of small placement shifts.
- Photo mug: Crop tightly to the subject and avoid placing faces near the wrap edges. A mockup preview helps confirm faces aren’t distorted near the handle.
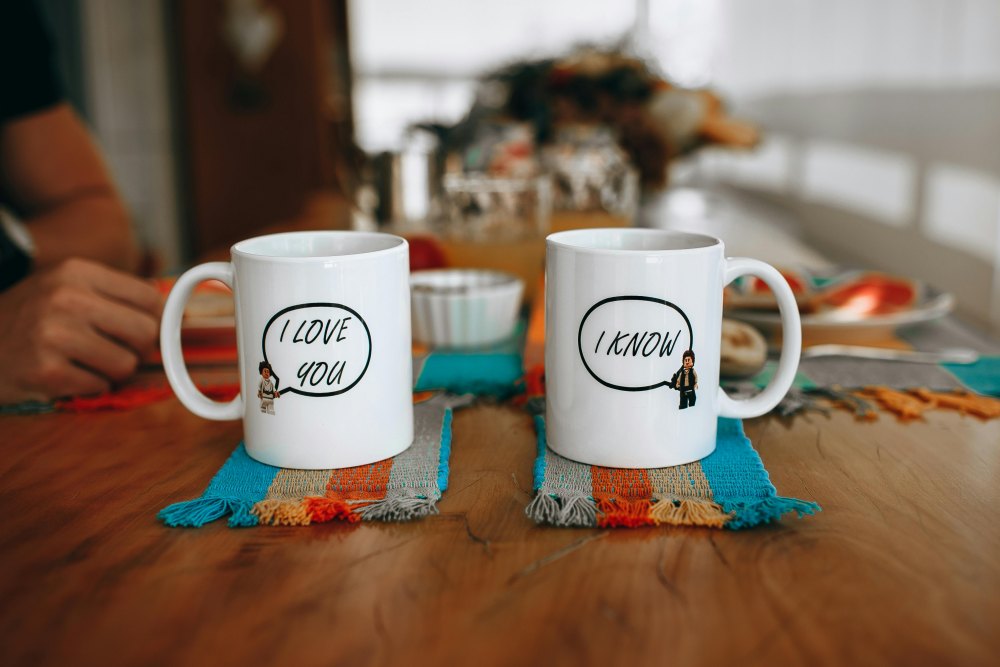
- Two-sided mug (front/back): Place one design for right-handed viewing and a second for left-handed viewing. Keep both inside safe zones to avoid handle interference.
- Pattern wrap: Use a repeating pattern with minimal fine detail. Keep a calm area for any text so it remains readable.
- “Welcome home” set: Duplicate the master design for multiple household names or dates. Track versions carefully to avoid mixing files.
Checklists
Before you start checklist
- Mug size (11 oz vs. 15 oz) and color choice
- One-sided vs. wraparound vs. two-sided layout
- Final text (spelling, capitalization, date formatting)
- High-resolution photo(s) if used
- Brand color references if the mug is branded
- Safe-area plan (especially near the handle)
- Accepted export formats expected by the print workflow
- Timeline buffer for proofing and shipping
- Folder structure for drafts vs. finals
- Recipient shipping address confirmed
Pre-export / pre-order checklist
- Design reads at mug size (zoom out test)
- Key elements kept away from edges and handle zones
- Photos are not scaled up from a small source
- Contrast checked on the chosen mug color
- Pantone/brand color notes recorded if relevant
- Accepted file type confirmed (PNG/JPG/PDF)
- Exported file reviewed at high zoom
- Mockup preview checked from multiple angles
- Final file named with version/date
- Order details recorded for reprints
Common Issues and Fixes
- Text looks smaller once wrapped
Increase font size and simplify the layout. Avoid long phrases and keep the headline short. - Design prints too close to the handle
Reposition the artwork away from the handle zone and keep a larger safe margin than you expect. - Photo looks blurry on the mug
Replace it with a higher-resolution photo and avoid enlarging the image after import. Crop tighter instead of scaling up. - Colors look different than expected
Ceramic printing can shift tones. Increase contrast and avoid subtle gradients; treat Pantone as a communication aid rather than a guarantee in consumer workflows. - Upload fails or the file won’t accept
Confirm accepted file types and re-export in a supported format. Keep file sizes reasonable and avoid uncommon color profiles. - Cropping surprises in the final preview
Move key elements inward and rely on the preview tool before submitting final artwork.
How To Use Mug Mockup Generators: FAQs
1) Template-first or product-first—what’s the tradeoff?
Template-first is faster for one-off gifts. Product-first is safer when a vendor has strict safe areas or when you need right/left-handed viewing placement.
2) Is Pantone matching realistic for a one-off housewarming mug?
Often it’s not necessary. Pantone references are more useful for branded sets or repeat runs where the goal is consistent communication with a print provider.
3) What file type is most common for mug printing?
Many consumer workflows accept PNG or JPG, and some accept PDF. The key is matching the vendor’s accepted file types and keeping the design at the intended size.
4) How do two-sided mug designs work in practice?
They usually place one design facing outward for right-handed holding and another for left-handed holding. The safe area near the handle is the main constraint.
5) What matters most for a “professional” look on a mug?
Legibility, spacing, and high-quality source images. Simple designs with clear margins generally print more predictably than busy layouts.