Streaming Setup Guide: Essential Gear for Going Live
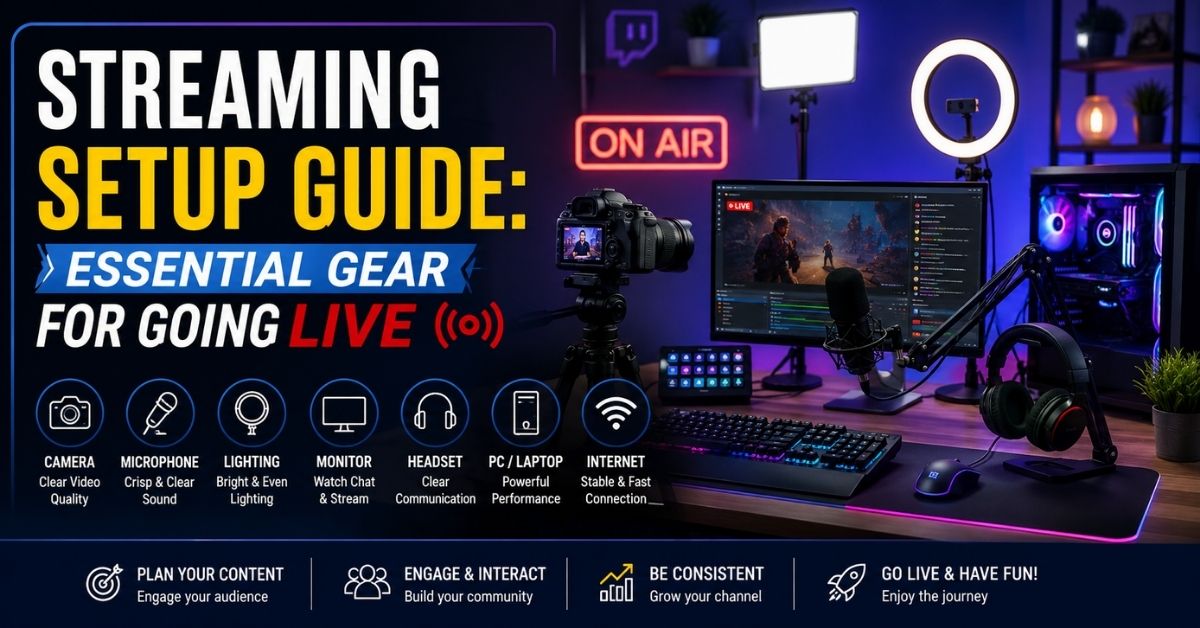
A strong Streaming Setup is not about buying the most expensive gear. It is about building a balanced system that keeps your stream stable, your voice clear, your face well lit, and your workflow easy to control. Whether you stream PC games, console games, tutorials, interviews, or just-chatting content, viewers notice consistency first. Clean audio, reliable encoding, readable visuals, and smooth scene changes matter more than flashy accessories.
The best approach is to prioritize the parts viewers experience directly. Start with dependable processing and internet performance, then improve audio, lighting, and camera quality. After that, add convenience tools such as a second monitor, capture card, or macro controller. This guide explains the core hardware, practical upgrade order, and equipment choices that make sense for Twitch, YouTube, and other live-streaming platforms without turning your desk into an unnecessary studio.
What Does a Good Streaming Setup Need?
An effective live streaming setup combines four things: enough computing power, intelligible audio, clear video, and a workflow you can operate without interrupting the broadcast. The computer must run your game or application while OBS Studio or similar software captures, composites, and encodes the program feed. If one component is overloaded, you may see dropped frames, audio glitches, stuttering gameplay, or delayed scene changes during the stream.
You do not need every accessory on day one. For most creators, the essentials are a capable computer or console, stable internet connection, microphone, streaming software, and a display. A webcam becomes important when your format depends on personality or face reactions. Lighting often improves camera quality more than replacing the camera itself, while a second monitor makes chat, alerts, moderation tools, and stream health easier to manage without covering the content.
A practical starter checklist includes:
- Capable PC, Mac, or game console
- Reliable broadband internet connection
- Dedicated microphone
- OBS Studio or another streaming application
- Main monitor or display
- Webcam if your content uses a facecam
- Basic key light
- Headphones
- Second monitor when your budget allows
Choosing the Right CPU and GPU for Streaming
For a single-PC gaming stream, the processor needs enough headroom to handle the game, background apps, browser sources, voice chat, and streaming software at the same time. A current Intel Core i7 or AMD Ryzen 7 class processor is a comfortable target for demanding workloads, while higher-end i9 or Ryzen 9 chips add more multitasking capacity. Less expensive CPUs can still work well when the graphics card handles video encoding.
The graphics card is especially important for gaming creators. Modern hardware encoders move the encoding workload away from the CPU, which helps preserve gameplay performance. NVIDIA RTX cards include dedicated NVENC hardware, and OBS generally recommends modern hardware encoding when available because it can reduce CPU load while maintaining good stream quality. Match the GPU to the games you actually play instead of buying one solely because it has a higher model number.
| Streaming Type | Hardware Priority | Why It Matters |
|---|---|---|
| PC gaming | GPU + capable CPU | Game rendering and encoding run simultaneously |
| Console gaming | Capture card + PC | Console supplies gameplay while PC manages broadcast |
| Just chatting | Microphone + camera | Production quality matters more than gaming performance |
| Tutorials | CPU + dual monitors | Useful for screen capture, software, and monitoring |
| Podcast streaming | Microphone + interface | Speech quality is the primary viewer experience |
A dual-PC system can separate gaming from encoding, but most creators do not need one. Modern hardware encoders have made high-quality single-PC broadcasting considerably more practical.
Why Audio Should Be Your First Upgrade
Audio should usually receive your first quality upgrade because viewers can follow a stream with an average camera, but muffled, distorted, echo-heavy, or inconsistent speech quickly becomes tiring. A dedicated USB microphone is the simplest step up from a headset mic. Position it close to your mouth, lower the gain, and keep it away from keyboards, fans, and speakers. Good microphone technique often improves sound more than an expensive microphone placed badly.
An XLR microphone and audio interface make sense when you want more control, cleaner gain staging, physical monitoring, or room to add additional microphones. Dynamic broadcast microphones are popular because their directional pickup can reduce unwanted room sound when used correctly. The Shure SM7B, for example, is a cardioid dynamic XLR microphone and typically needs substantial clean preamp gain, while a USB model such as the Logitech G Yeti offers a simpler plug-and-play workflow.
Before replacing your microphone, check these basics:
- Move the microphone closer to your mouth.
- Reduce microphone gain when possible.
- Keep speakers from feeding sound back into the microphone.
- Use headphones while streaming.
- Reduce hard, reflective surfaces around the desk.
- Set game audio below your speaking voice.
- Test keyboard noise before going live.
Good audio is not simply about volume. Your voice should remain clear and understandable when gameplay, music, notifications, and other people are present.
Camera and Lighting for a Clearer Stream
A 1080p 60fps webcam is more than sufficient for most facecam overlays because the camera usually occupies only a small portion of the final frame. Higher-resolution cameras are useful when you crop aggressively, create full-screen talking segments, or repurpose recordings for edited content. Elgato’s current Facecam 4K supports up to 4K at 60fps, while the Razer Kiyo Pro supports uncompressed 1080p at 60fps and includes an adaptive light sensor.
Lighting has a larger effect on perceived camera quality than many beginners expect. Put a soft key light slightly above eye level and about 30 to 45 degrees to one side of your face. Diffusion reduces harsh shadows and shiny highlights. A second, weaker light can soften contrast, while a background light adds separation. Even an inexpensive webcam can look noticeably cleaner when exposure stays stable and the camera does not have to amplify a dark image.
A mirrorless camera is worth considering when your stream depends heavily on visual presentation. It can provide better lenses, greater control over depth of field, and stronger low-light performance. However, it may also require a clean HDMI output, appropriate power solution, mounting equipment, and a capture card.
For many creators, the smarter upgrade path is therefore:
- Improve lighting.
- Correct webcam positioning.
- Adjust exposure and white balance.
- Upgrade the webcam if necessary.
- Move to a mirrorless system only when the content justifies it.
Monitors, Capture Cards, and Stream Controls
A dual-monitor display is one of the most useful workflow upgrades for serious streaming. Keep the game, presentation, or full-screen application on the primary display and place OBS Studio, chat, alerts, moderation tools, music controls, and performance monitoring on the second. This reduces window switching and helps you catch problems before viewers start reporting them. Matching refresh rates is convenient, but the secondary monitor does not need premium gaming specifications.
Console streamers usually need a capture card if they want to bring PlayStation, Xbox, Nintendo, or another HDMI source into a computer-based broadcast. PC streamers may also use a capture card in a two-computer workflow. Control surfaces are optional but efficient: a 15-key Elgato Stream Deck can trigger scene changes, mute sources, launch actions, and run multi-step commands without forcing you to hunt through software menus during a live segment.
Useful Stream Deck or macro-key actions include:
- Switch between gameplay and talking scenes
- Mute or unmute a microphone
- Disable a camera
- Trigger sound effects
- Post predefined chat messages
- Start or stop recording
- Control music
- Launch applications
- Trigger several commands with one button
None of those functions requires a Stream Deck. OBS hotkeys can perform many similar actions. Dedicated control hardware simply makes a complicated broadcast easier to operate consistently.
Recommended Streaming Equipment and Upgrade Priorities
The right equipment depends on your room, content style, and existing hardware, so treat product recommendations as reference points rather than mandatory purchases. The Shure SM7B suits creators who want an XLR broadcast microphone and already have an interface with sufficient gain. The Logitech G Yeti is easier for a first USB setup. For video, the Facecam 4K targets higher-resolution production, while the Kiyo Pro remains practical for 1080p60 streaming in variable lighting.
Upgrade in the order that removes your biggest current limitation. If viewers struggle to hear you, improve the microphone and room acoustics before buying a new camera. If the image is noisy, fix lighting before replacing the webcam. If gameplay stutters, investigate encoder settings, GPU load, and network stability before adding accessories. A Stream Deck is valuable once you have enough scenes and actions that keyboard shortcuts become difficult to remember or operate consistently.
| Equipment | Type | Standout Feature | Best Fit |
|---|---|---|---|
| Shure SM7B | XLR dynamic microphone | Cardioid broadcast design | Advanced voice-focused setups |
| Logitech G Yeti | USB condenser microphone | Multiple pickup patterns | Simple plug-and-play streaming |
| Elgato Facecam 4K | Webcam | Up to 4K 60fps | Higher-resolution video |
| Razer Kiyo Pro | Webcam | 1080p60 and adaptive light sensor | Variable-light streaming |
| Elgato Stream Deck | Control surface | 15 customizable LCD keys | Multi-scene broadcast control |
Do not assume the most expensive option is automatically appropriate. The SM7B, for example, can require considerably more supporting audio hardware than a USB microphone. A creator streaming twice per month may benefit more from simplicity than from studio-grade expandability.
How to Put Your Streaming Setup Together
A professional streaming setup is built through testing, not through one large shopping trip. Configure your base canvas, output resolution, frame rate, encoder, audio levels, scenes, and alerts in OBS Studio, then record a private test before going live. Watch the recording on both headphones and phone speakers. Check whether your voice stays understandable over game audio and whether rapid motion creates visible compression or dropped frames.
Use a simple pre-stream checklist every time you broadcast. Confirm the correct microphone and camera are selected, verify audio meters, close unnecessary apps, test the capture source, check lighting, and confirm your stream title and category. Then monitor CPU or GPU load and dropped frames during the first few minutes. Once the technical foundation is stable, spend your energy on pacing, interaction, storytelling, and content rather than constantly adjusting equipment.
Conclusion
The best streaming setup balances performance, audio, video, lighting, and control instead of maximizing one specification. Start with stable encoding and clear sound, add flattering lighting and a capable webcam, then improve monitoring and automation as your workflow becomes more complex. A strong microphone and reliable computer will usually make a bigger difference than chasing 4K video before the rest of the system is ready.
Build around your actual content. Fast-paced PC gaming needs more graphics and encoding headroom, console streaming may require a capture card, and just-chatting streams benefit more from microphone, camera, and lighting quality. Once your setup is stable, make upgrades only when you can identify a specific problem they solve. That approach keeps costs controlled and gives viewers the consistent, professional live experience they care about most.